
Salesforce Sales Cloud Integration with Zinrelo
This document will guide you through the Salesforce Sales Cloud integration.
This document is for Salesforce Sales Cloud installation. After this, you need to sync your Salesforce Sales Cloud account with SFMC; for more details, click here.
Installation Process
You need to install the "package" of Salesforce into your organization. A managed package is a collection of components and applications that make the connection between your Salesforce Sales Cloud and Marketing Cloud accounts work.
Follow along with these steps to download the latest version of the managed package.
- Use the given URL to install the package in any organization:
https://login.salesforce.com/packaging/installPackage.apexp?p0=04t5g0000002dLZ
Note: If you are installing in a sandbox organization, change the first part of the URL to http://test.salesforce.com.
- Use your admin credentials to log in to your Salesforce account, and then click "Install for All Users."
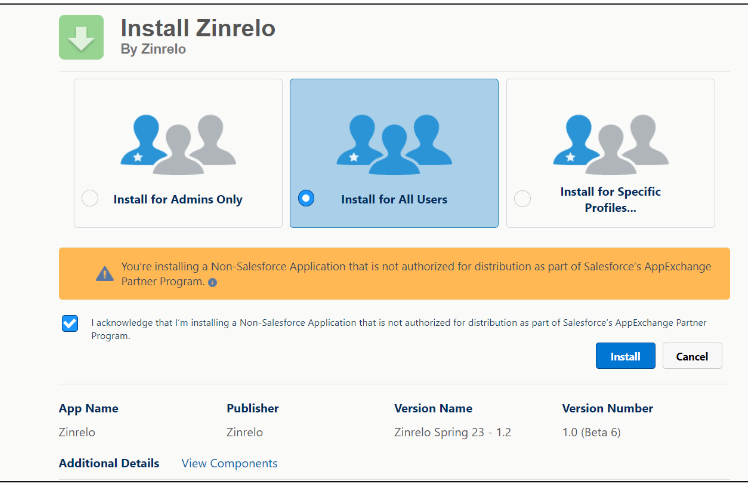
- Tick the acknowledgement box and then press the "Install" button.
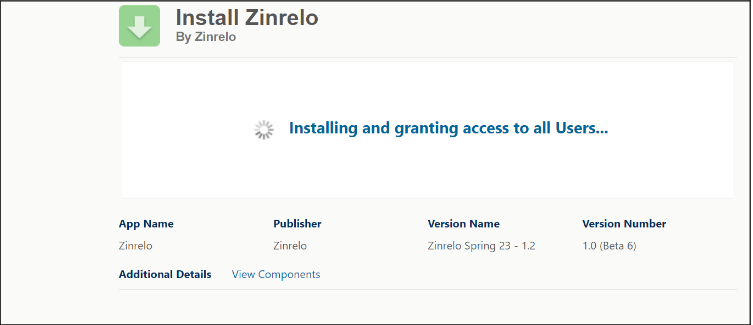
- Wait for the installation to complete. And then click on "Done."

Register Salesforce Site Domain
Things to consider while setting up Salesforce sites:
- Your company's Salesforce Sites domain is used for all the sites that you create.
- To make public websites and apps that work directly with your Salesforce.com organization, you must register the domain for your company's Salesforce site.
- Your Salesforce site domain must be unique, such as your company's name or a variation of your company's name, ex. "mycompanyportalname."
Let's begin.
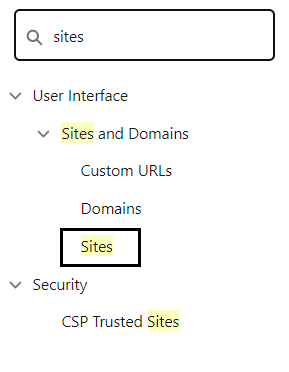
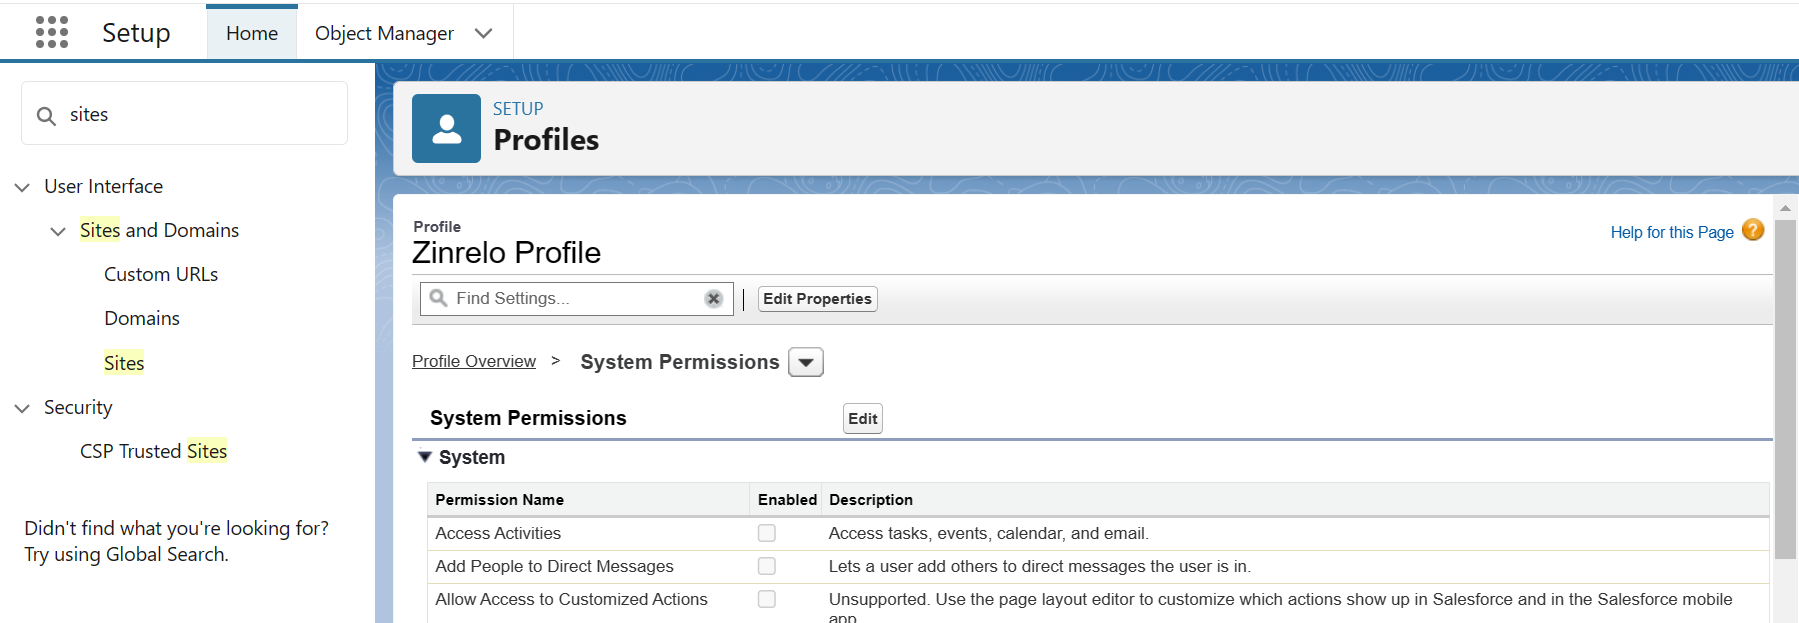
- Click on "Setup."
- In "Quick Search," find "Sites" and click.
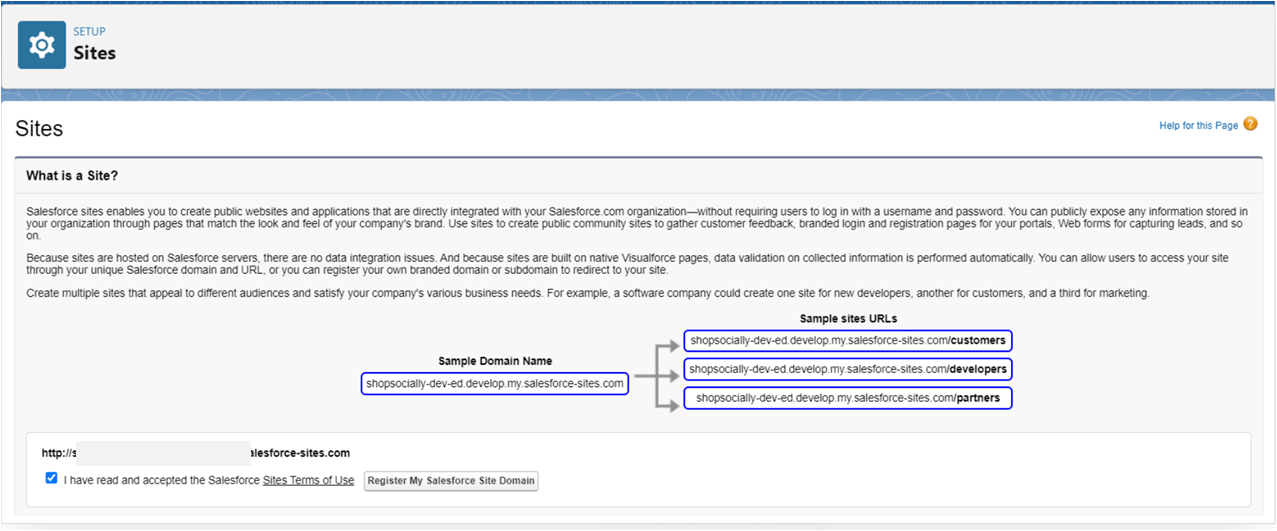
- Tick "Site Terms of Use" and click on "Register my Salesforce Site Domain."
- Click on “New.”

- Fill up the details for your site.
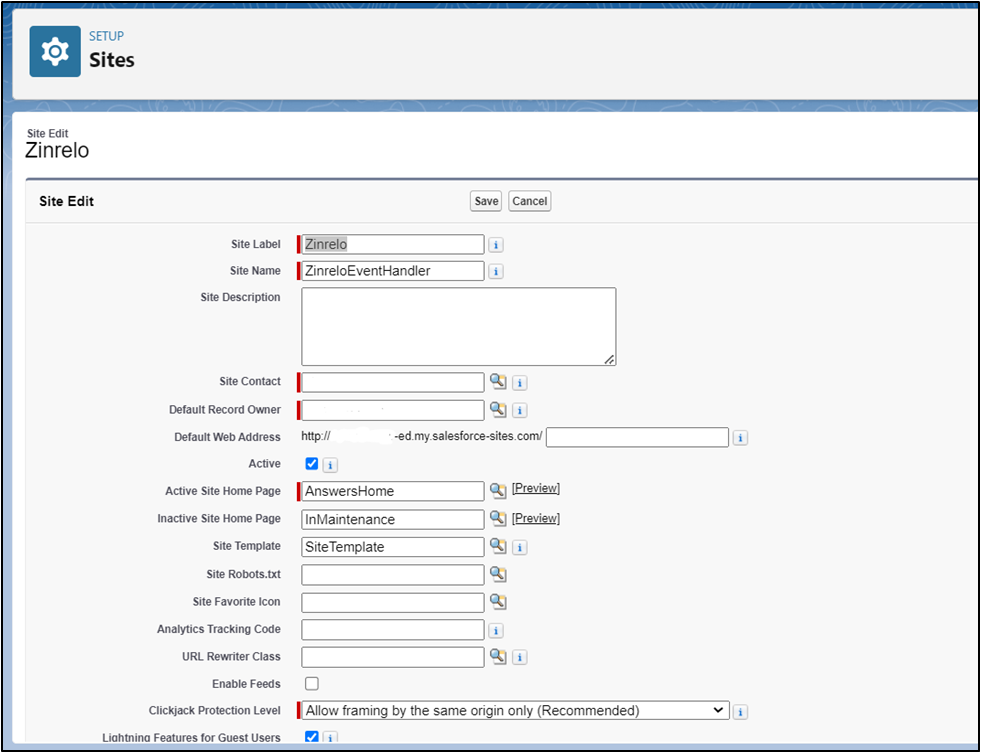
Make sure you add "Site Label" and "Site Name," the same as given in the screenshot.
Note: You can enable other settings as per your requirements.
- Activate your site domain when you’re ready to make your site available to the public. Click on the "Activate" button.

Note: You can activate or deactivate your Salesforce site by clicking the "Activate" or "Deactivate" button in the Action column.

Note: If you already have a registered site, you do not need to create a new one. You can use the same registered domain for your organization.
Enable the Zinrelo Webhook for Salesforce
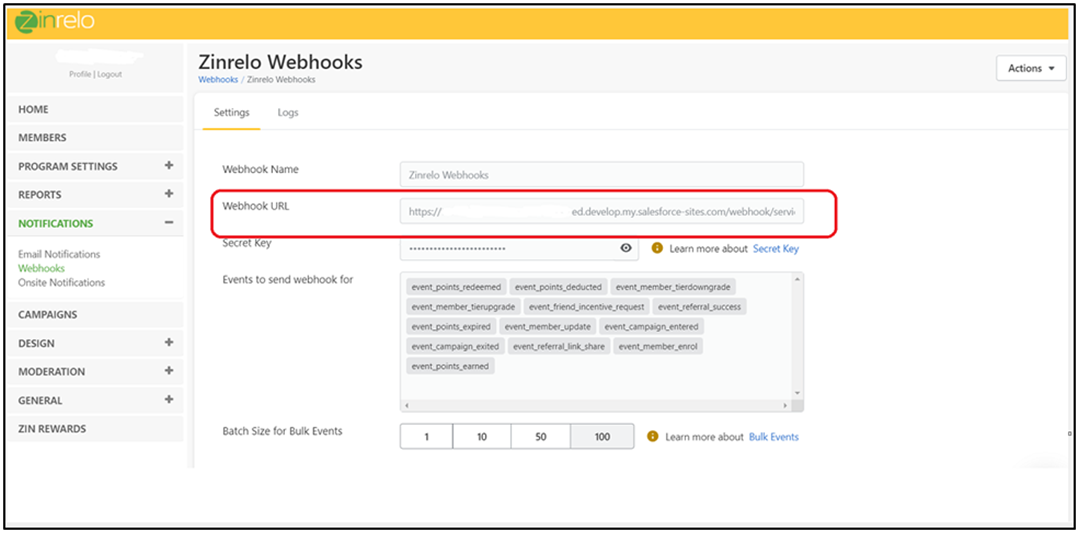
Once you are done with site hosting, login to the Zinrelo portal for webhook settings.
Login to Zinrelo Site >> Notification Tab >> Go to Webhooks >> Select Settings >> Enter the webhook URL.
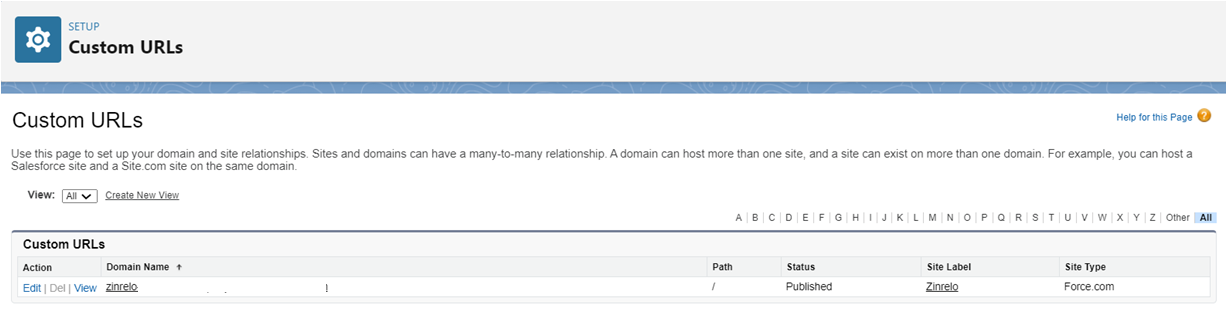
For checking the domain name & path in salesforce Go To Setup >> Quick Find Box >> Sites >> Custom URLs
The webhook url should be like-
https://Domain Name/Path/services/apexrest/Zinrelo/HandleZinreloEvents.
In which, “services/apexrest/Zinrelo/HandleZinreloEvents” has to be static, while the domain name and path have to be updated.
- Domain Name - Copy the same domain name that you just created in salesforce.
- Path - This is optional if not given as shown in below fig.

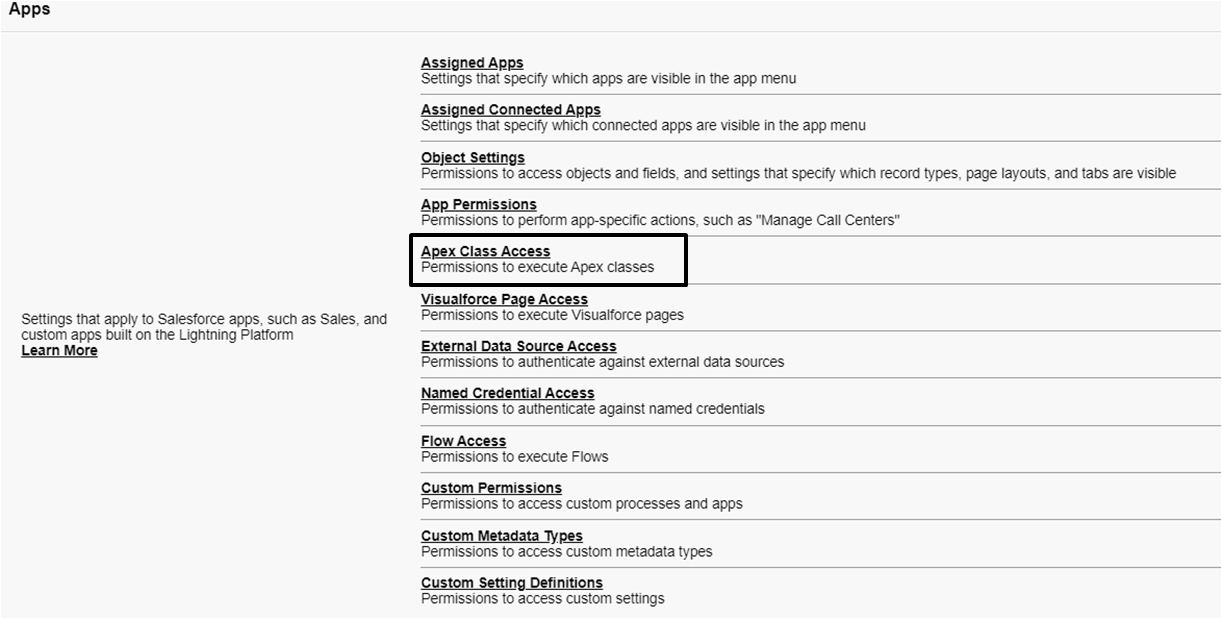
Give Access to Apex Classes
In Salesforce, Apex classes are used to implement the actions associated with an object. It is to give permission to objects, fields, users, tab settings, app settings, Apex class access, Visualforce page access, page layouts, record types, login hours, and login IP ranges.
Note: You will need to ensure Apex classes are included for the login user. Otherwise, this can cause an error like "You don’t have apex class permission."
To grant access to Apex Classes, follow the given steps:
- Go to "Setup" > in the Quick Find Box search "Site" >> Click on "Site Label."

- Click on "Public Access Settings."
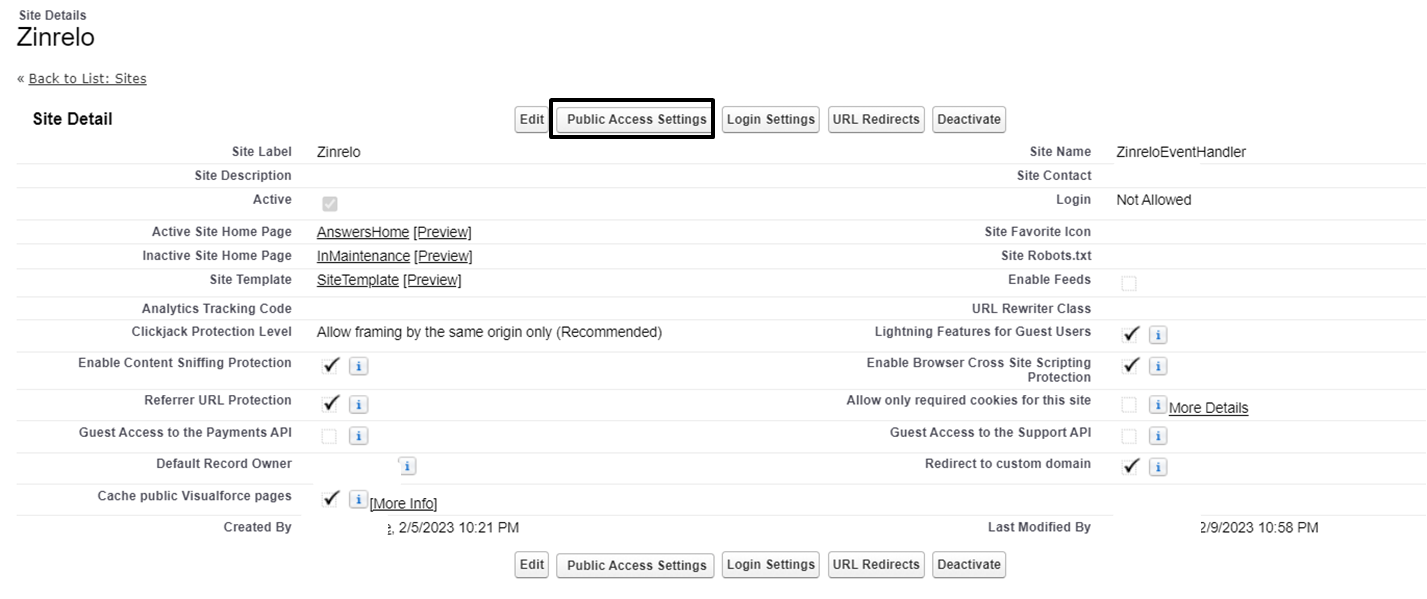
- Click on "Apex Class Access."
- Click on "Edit" >> Select the classes >> click on Add >> Save
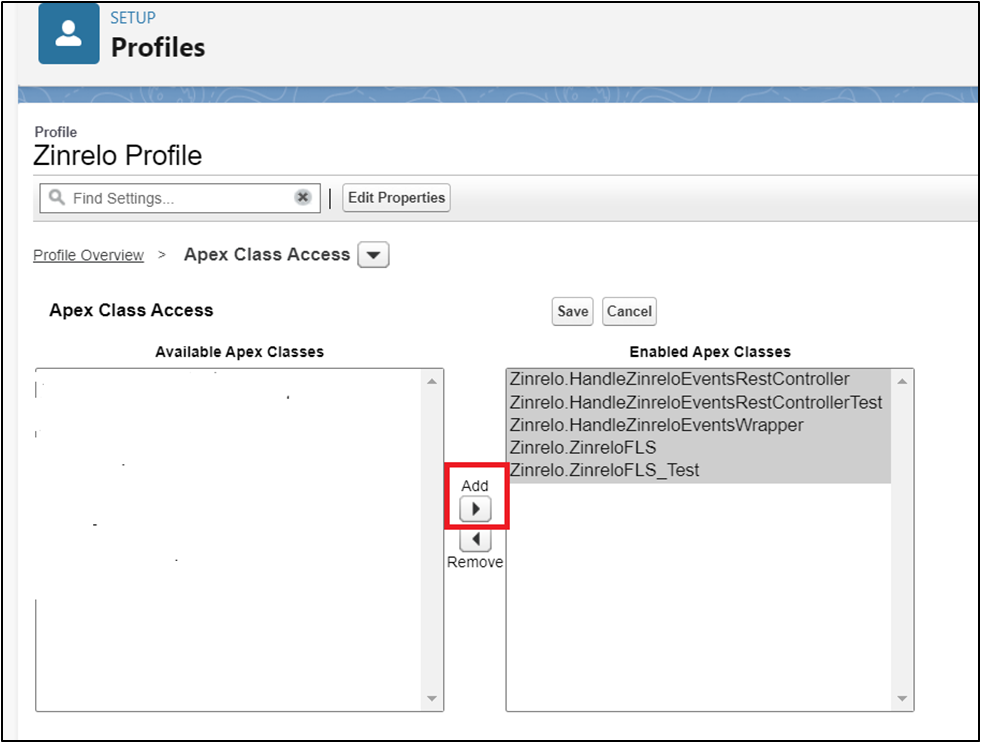
Classes need to be included:
- HandleZinreloEventsRestController
- HandleZinreloEventsWrapper
- ZinreloFLS
- HandleZinreloEventsRestControllerTest
- ZinreloFLS_Test
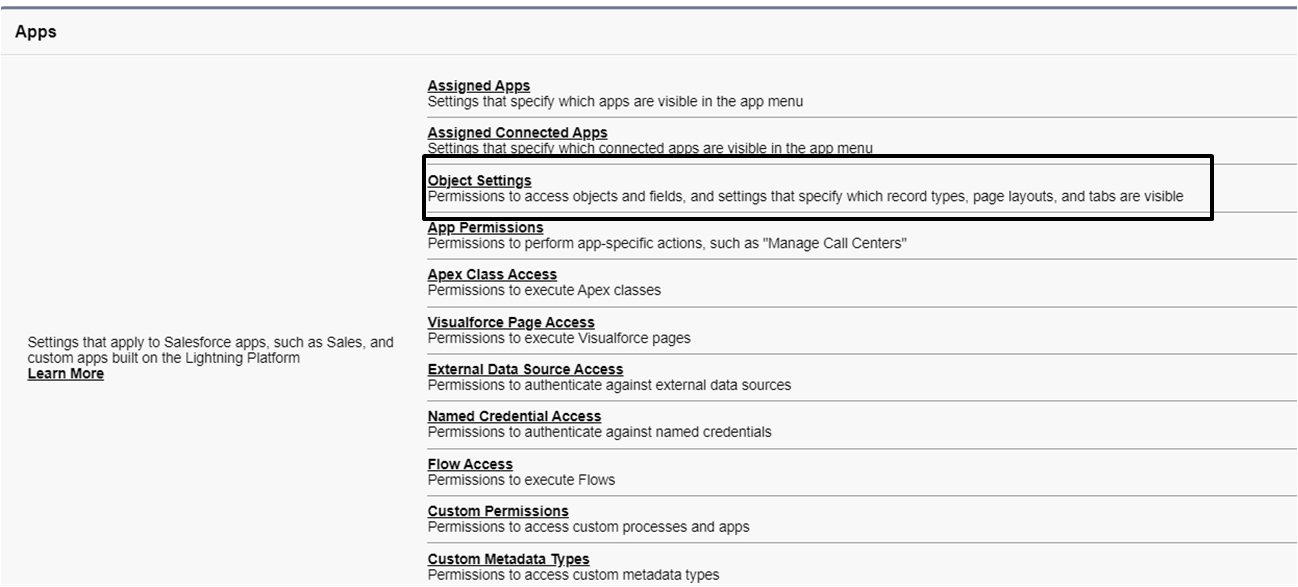
Give Access to Objects
A permission is required to grant access to edit the fields within members, contacts and ZinreloDebugLogs objects. Follow the given steps to give access to the objects.
Member access
- Go to "Setup" > in the Quick Find Box search "Site" >> Click on "Site Label." >> Click on "Public Access Setting" >> Click on "Object Settings."
[If you are unable to see the following UI, then please follow these steps:
Go to "Setup" >> Search "User Management Settings" >> Enabled "Enhanced Profile User Interface" >> Return to your first step]

- Select the "Member" object.
- Click on the members to edit the object.
- Click on the "edit" button.
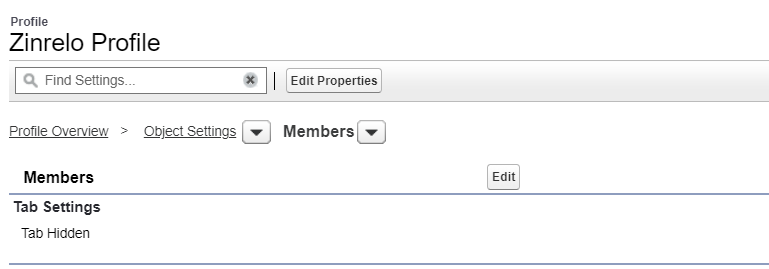
- Enable Object Permission and check the boxes for the associated fields before saving.

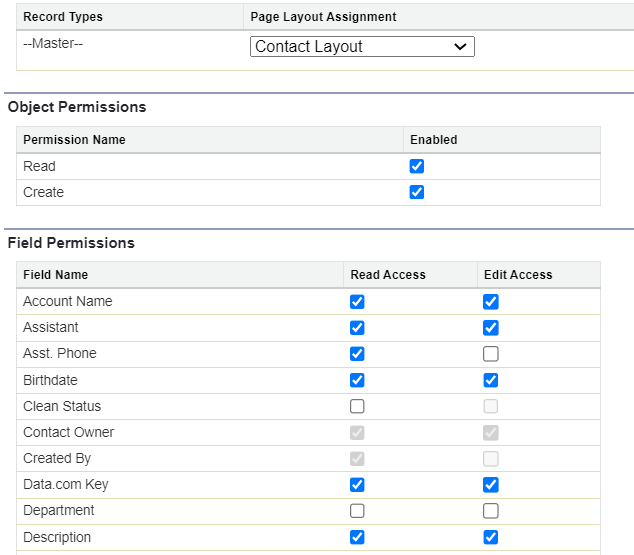
Contact access
- Go to "Setup" > in the Quick Find Box search "Site" >> Click on "Site Label." >> Select "Public Access Setting" >> Click on "Object Settings."
- Select the "Contacts" object.

- Click on the contacts to edit the object.
- Click on the "edit" button.
- Enable Object Permission and check the boxes for the associated fields before saving.
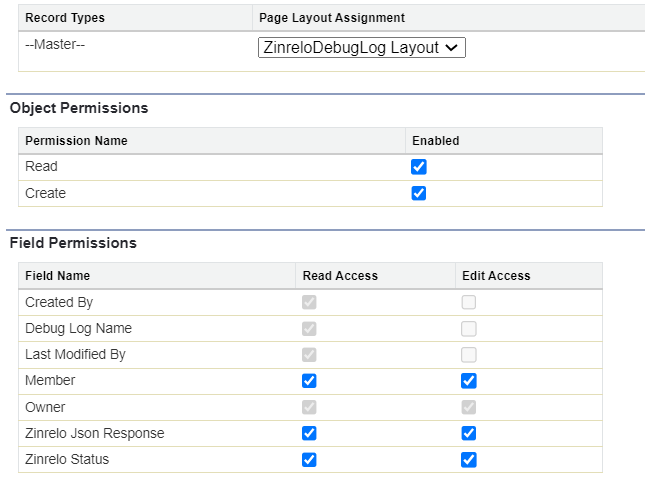
ZinreloDebugLogs access
- Go to "Setup" > in the Quick Find Box search "Site" >> Click on "Site Label." >> Click on "Public Access Setting" >> Click on "Object Settings."
- Select the "ZinreloDebugLogs" object.

- Click on the contacts to edit the object.
- Click on the "edit" button.
- Enable Object Permission and check the boxes for the associated fields before saving.
Give System Permissions
- Go to "Setup" > in the Quick Find Box search "Site" >> Click on "Site Label." >> Click on "Public Access Setting" >> Click on "System Permissions."
- Click on the "Edit" button.
- Give permissions to Apex REST Services, API Enabled & View All Custom Settings.
Configure Zinrelo Keys and Events in Salesforce
To begin with configuring Zinrelo keys and events in Salesforce, open "All Custom Metadata Type" in Salesforce.
Go to "Setup" >> in the Quick Find Box search "Custom Metadata Types" >> Click on it
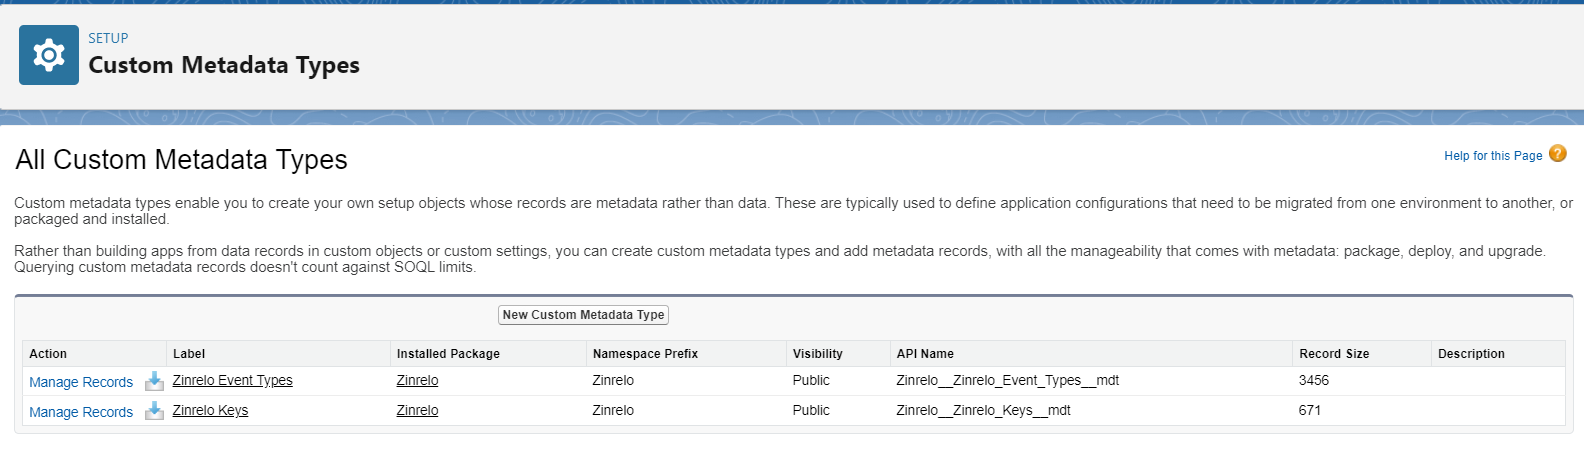
Configure Zinrelo keys
Step 1: Click on the label "Zinrelo Keys."

Step 2: Click on the "Manage Zinrelo Keys" or "Manage Records" button.
Step 3: Click on "New."
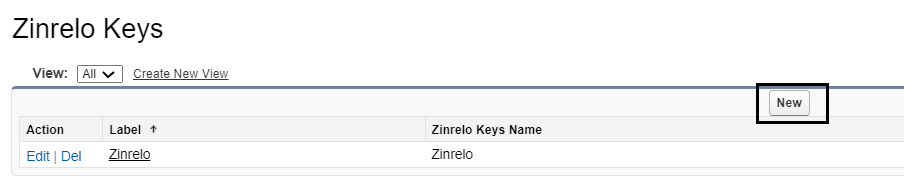
Note: Record name should be Zinrelo.
Step 4: Update the value as per the given table:
| Label | Zinrelo |
|---|---|
| Zinrelo Keys Name | Zinrelo |
| Create Debug for Success | [ ] |
| Insert New Zinrelo Member and Contact | ☑ |
| Unique Identifier for Zinrelo Member | Insert Contact field API Name [or FIELD NAME] |
| HMAC Secret Key | Copy from Zinrelo Site |
Description of each values:
- If the Create Debug for Success checkbox is checked, the debug for success operation will be visible.
- If the Insert New Zinrelo Member and Contact checkbox is checked, a new member and contact record will be added to salesforce.
- In the Unique Identifier for Zinrelo Members, we can insert any one contact field API name. [Go to "Contact object" >> Select FIELD NAME and paste here in record.]
Note: Select any field except "Lookup" data type. We recommend to select email, phone number or member ID as a Unique Identifier.
- HMAC Secret Key: You can get this secret key from the Zinrelo site by following the below steps:
- Login now to Zinrelo portal.
- Go to Zinrelo Site >> Expand Notification Tab >> Go To Webhooks >> Click on Settings >>Secret Key shown in below figure.
- Copy same Secret Key from site and paste in HMAC Secret Key field.
- Click on "Save."
Configure Zinrelo event type
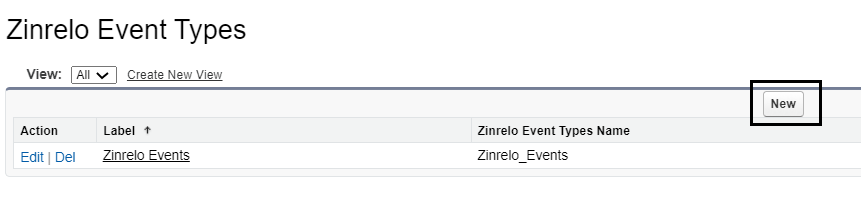
Step 1: Click on the label "Zinrelo Event Types."

Step 2: Click on "Manage Zinrelo Event Types" or Manage record button.
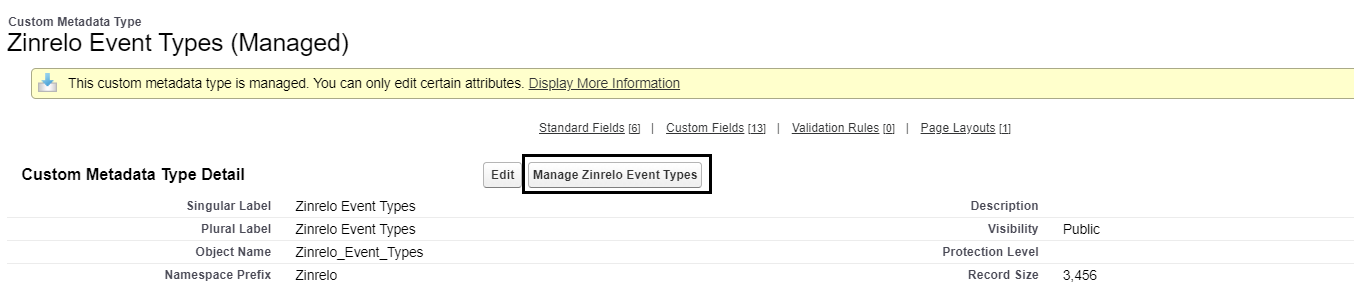
Step 3: Click on "New."
Step 4: Click on the "Edit" button and fill in the following values:
| Label | Zinrelo Events |
|---|---|
| Zinrelo Event Types Name | Zinrelo_Events |
| Event Referral Link Share | event_referral_link_share |
| Friend Incentive Request | event_friend_incentive_request |
| Member Enrollment | event_member_enrol |
| Member Tier Downgraded | event_member_tierdowngrade |
| Member Tier Upgraded | event_member_tierupgrade |
| Member Updated | event_member_update |
| Points Awarded | event_points_earned |
| Points Deducted | event_points_deducted |
| Points Expired | event_points_expired |
| Points Redeemed | event_points_redeemed |
| Referral Success | event_referral_success |
| Campaign Entered | event_campaign_entered |
| Campaign Exited | event_campaign_exited |
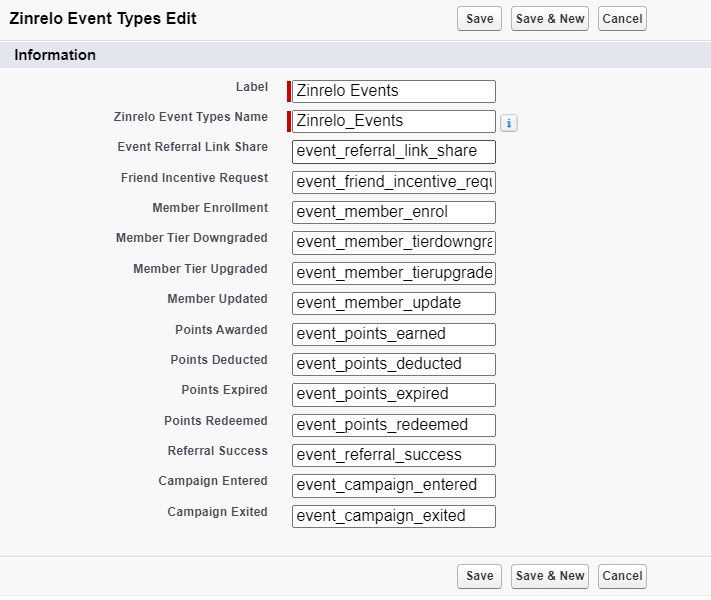
Note: The value should be passed as given in the table to allow the system to work efficiently.
Step 5: Click on "Save."
How to create ZinreloDebugLogs
Step 1: In Quick Search, search "Tabs" and click on it.
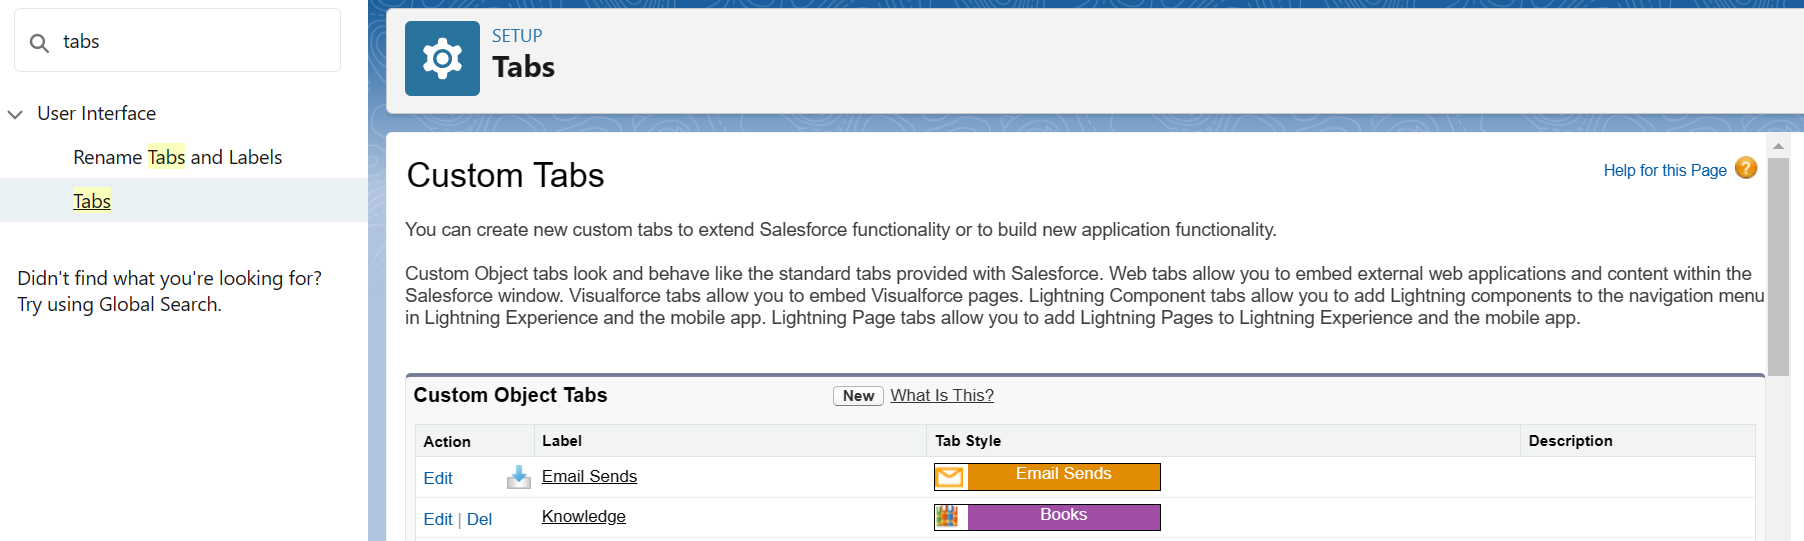
Step 2: Click on the "New" button.
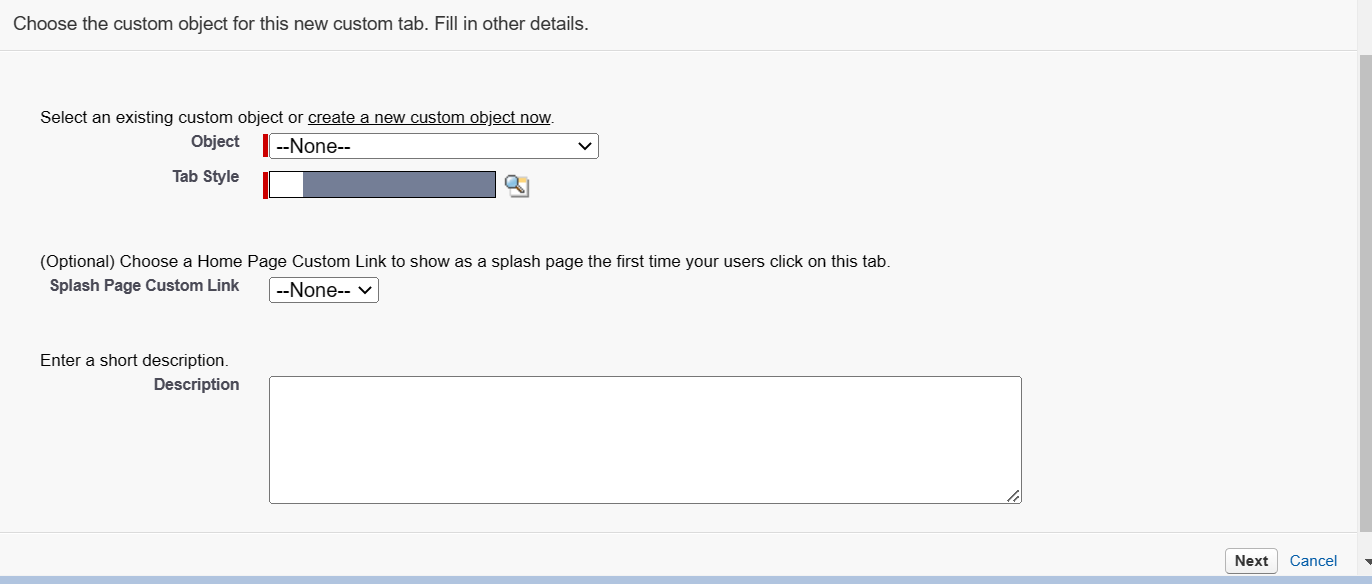
Step 3: Enter the details.
- Select "ZinreloDebugLogs" from the object dropdown.
- Select the tab style.
- Click on the "Next" button.
Step 4: Click on the "Next" button.
Step 5: Then, click on the "Save" button.
Note: You will find ZinreloDebugLogs in the nine dots next to the Home button.

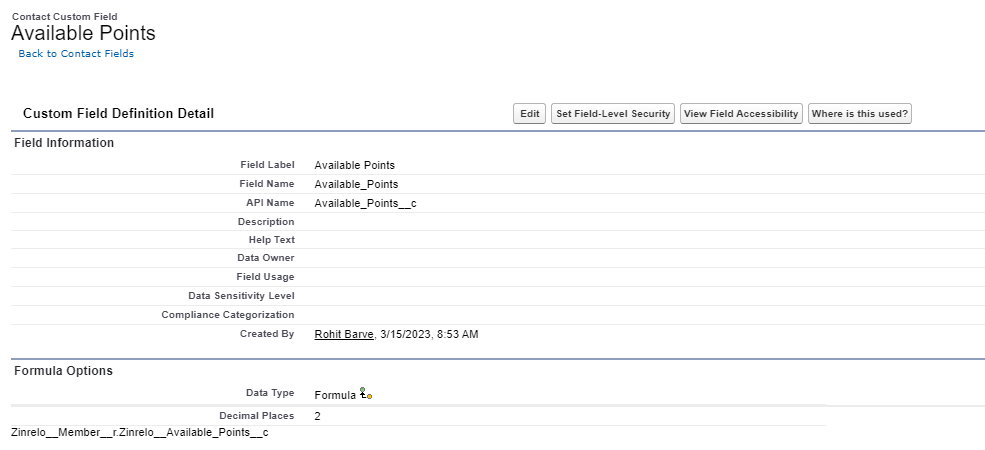
Create Formula Field
A formula field is created to bring data from the member custom object to the contact object. It is necessary to have a relationship between the member custom object and contact objects.
We need to bring to the contact object updated while the events happened, for example, points redeemed, points expired. For these events, we are creating a formula field on the contact account that will sync data to SFMC.
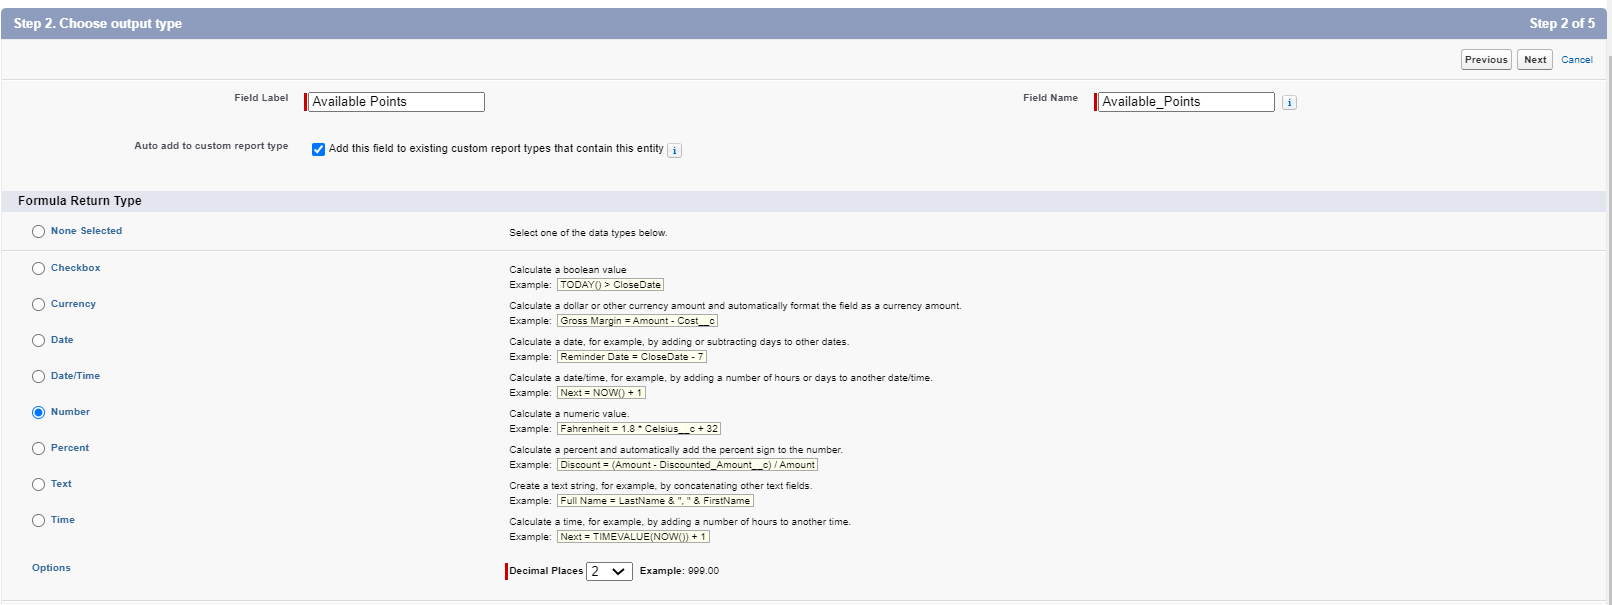
These fields can be called out in emails to get the members' data. For example, you can create a formula field called "Available Points" and call out this field in emails to have the data of available points for each member.
Also, when the contact record is updated, that checkbox will be true and immediately false. This will limit data sync to SFMC, i.e., only required data will get synced.
Follow the given steps for creating the formula field:
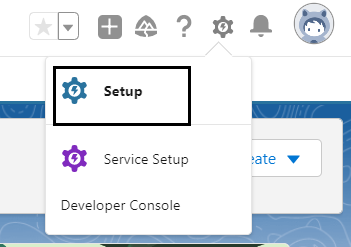
- Click the gear icon and select "Setup."
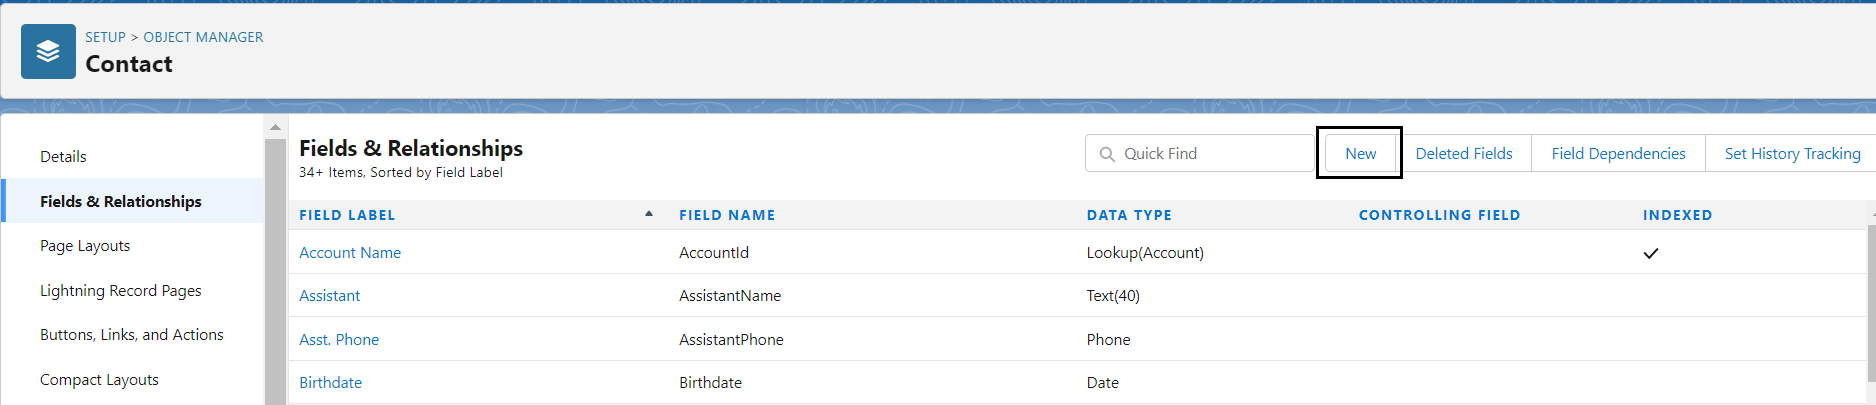
- Click on "object manager" and select "Contact object."

- Select "Fields & Relationships" and click on "New."
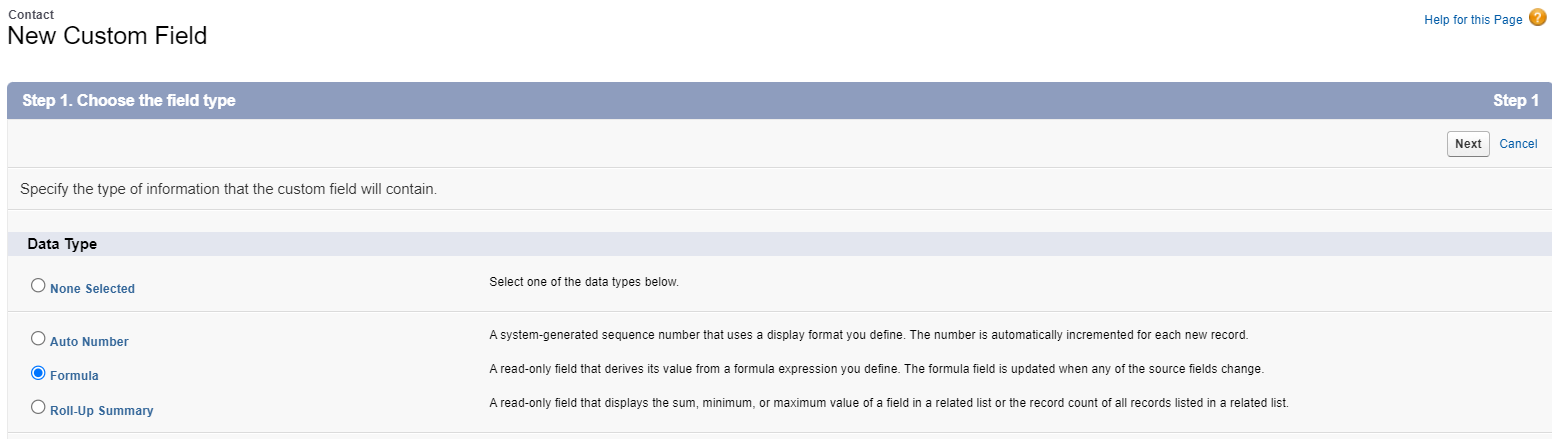
- Select "Formula" as the data type and click "Next."
- Give the field's name and label, and select the formula return type. And click "Next."
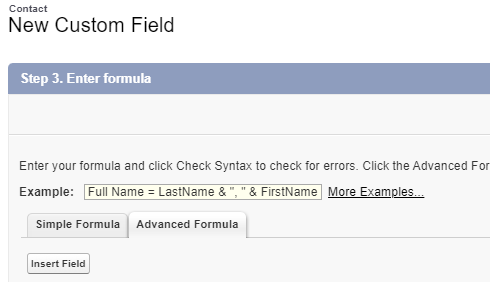
- Click on "Advanced Formula" and then "Insert Field."
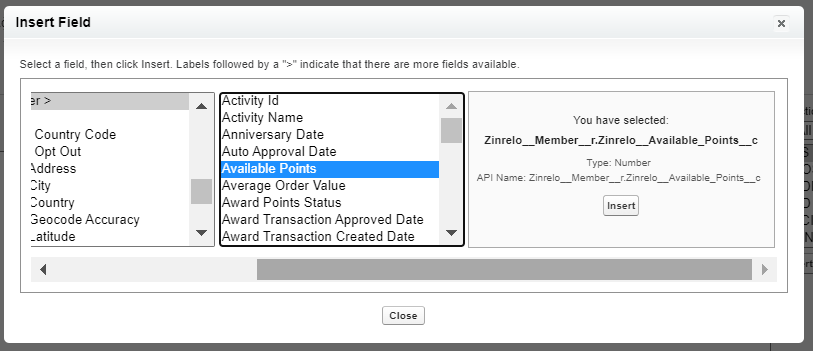
- Insert your formula field value, which will evaluate and return the result to the formula field. Select "Contact >" then "Member >" and the formula field you created.


- Click "Next," select "Visibility," and click "Next."
- Select the page layout where the field should be included. And click "Save."
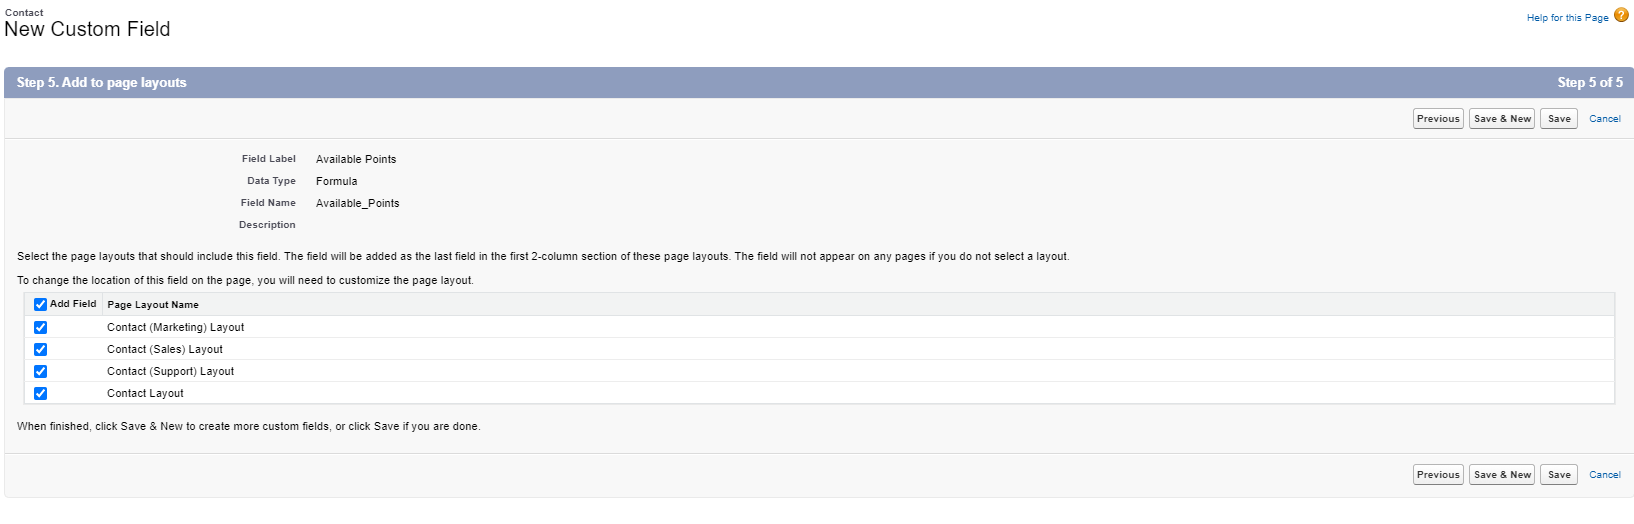
- A formula field is created.

Note: Salesforce has strict limits on the number of fields that you can customize. A Developer Edition organization, for example, can have up to 500 custom fields, whereas Unlimited and Performance organizations can have up to 800 total custom fields.
Member fields you can create in Salesforce
| Fields | Description |
|---|---|
| Member ID | Unique member ID. |
| First Name | First name of the member. |
| Last Name | Last name of the member. |
| Email address of the member. | |
| Address | Address of the member. |
| Phone | Phone number of the member. |
| Member status | Status of the member such as active, block, deleted, opted out. |
| Member tags | Tags associated with the member. |
| Number of purchases | Number of purchases made by member. |
| Number of redemptions | Number of redemptions made by member. |
| First purchase date | First purchase date of purchase. |
| Last purchase date | Last purchase date of purchase. |
| Birthdate | Birthdate of the member. |
| Enrollment date | Member enrollment date. |
| Last modified date | Last modified date of the transaction |
| Anniversary date | Anniversary date of the member. |
| Preferred language | Preferred language of the member. |
| Loyalty tier name | Loyalty tier name. |
| Loyalty tier ID | Loyalty tier ID. |
| Qualified points | Members qualified points. |
| Tier current period start | Current tier start date. |
| Tier current period end | Current tier end date. |
| Lifetime points earned | Lifetime points earned by the member. |
| Lifetime points expired | Lifetime points expired of the member. |
| Lifetime points redeemed | Lifetime points redeemed by the member. |
| Lifetime points deducted | Lifetime points deducted of the member. |
| Available points | Available points of the member. |
| Referral URL | Unique referral URL used for sharing purposes. |
| Custom attributes | Custom attributes created for the store such as nationality, gender, etc. |
| Zinrelo member ID | Zinrelo generated member ID. |
Event fields you can create in Salesforce
| Events | Fields & Description |
|---|---|
| Points awarded | -Award Transaction Id: Unique ID award transaction is associated with. -Award transaction approved date: Approved date of award transaction. -Award transaction created date: Created date of award transaction. -Activity ID: Activity ID such as made_a_purchase, created_an_account, etc. -Activity name: Name of the activity such as account creation, share on Facebook, etc. -Award points status: Point status such as approved, pending, etc. -Points awarded: Number of points awarded to member. -Points expiration date: Date of point expiration. -Auto approval date: Points auto approval date. -Member tags: Tags member is associated with. -Number of purchases: Number of purchases made by member. -First purchase date: First purchase date of purchase. -Last purchase date: Last purchase date of purchase. -Last modified date: Last modified date of the transaction. -Loyalty tier name: Loyalty tier name. -Qualified points: Members qualified points. -Lifetime points earned: Lifetime point earned by the member. -Available points: Available points of the member. -Custom attributes: Custom attributes created for the store such as nationality, gender, etc. |
| Points redeemed | -Redeem transaction Id: Unique ID redeem transaction is associated with. -Redeem transaction approved date: Approved date of redeem transaction. -Redeem transaction created date: Created date of redeem transaction. -Redeemed points status: Point status such as approved, pending, etc. -Points redeemed: Number of points redeemed by the member. -Reward ID: Activity ID such as reward_bc668, reward_a1e91, etc. -Reward name: Name of the reward such as $10 OFF Coupon, $15 OFF Coupon, etc. -Reward link: Flexible reward link. -Coupon code: Code available to loyalty members for discount. -Member tags: Tags member is associated with. -Number of redemptions: Number of redemptions made by member. -Last modified date: Last modified date of the transaction. -Lifetime points redeemed: Lifetime point redeemed by the member. -Available points: Available points of the member. |
| Points deducted | -Deduct transaction Id: Unique ID deduct transaction is associated with. -Deduct transaction created date: Created date of deduct transaction. -Deduct transaction approved date: Approved date of deduct transaction. -Deduct points status: Point status such as approved, deducted, pending, etc. -Points deducted: Number of points deducted by the member. -Loyalty tier name: Loyalty tier name. -Qualified points: Members qualified points. -Lifetime points earned: Lifetime point earned by the member. -Lifetime points deducted: Lifetime point deducted by the member. -Available points: Available points of the member. |
| Points expired | -Expired transaction Id: Unique ID expired transaction is associated with. -Points expired: Number of points expired. -Lifetime points expired: Lifetime points expired of the member. -Available points: Available points of the member. |
| Tier upgrade | -Loyalty tier name: Loyalty tier name. -Loyalty tier Id: Loyalty tier ID. -Qualified points: Members qualified points. -Tier current period start: Current tier start date. -Tier current period end: Current tier end date. |
| Tier downgrade | -Loyalty tier name: Loyalty tier name. -Loyalty tier Id: Loyalty tier ID. -Qualified points: Members qualified points. -Tier current period start: Current tier start date. -Tier current period end: Current tier end date. |
| Friend incentive request | -Friend incentive email address: Email address of the referred friend. -Friend incentive coupon: Discount coupon issued to referred friend. |
| Referral success | -Referral success friend first name: Referral first name. -Referral success friend last name: Referral last name. -Referral success friend email: Referred friend email address. -Referral success coupon code: Discount coupon issued to referred friend. -Loyalty tier name: Loyalty tier name. -Loyalty tier Id: Loyalty tier ID. -Qualified points: Members qualified points. -Lifetime points earned: Lifetime point earned by the member. -Available points: Available points of the member. |
| Campaign entered | -Campaign entered event name: Event name such as event_points_earned, event_points_deducted, etc. -Campaign entered event Id: Event id such as event_points_earned, event_points_deducted, etc. -Campaign entered delay in days: Delay for webhook notification. -Entered campaign name: Campaign name. -Entered campaign Id: Campaign ID which we see in campaign url. -Member tags: Tags member is associated with. -Loyalty tier name: Loyalty tier name. -Loyalty tier Id: Loyalty tier ID. -Qualified points: Members qualified points. -Lifetime points earned: Lifetime point earned by the member. -Lifetime points redeemed: Lifetime point redeemed by the member. -Lifetime points deducted: Lifetime point deducted by the member. -Available points: Available points of the member. |
| Campaign exited | -Campaign entered event name: Event name such as event_points_earned, event_points_deducted, etc. -Campaign entered event Id: Event id such as event_points_earned, event_points_deducted, etc. -Exited campaign name: Campaign name. -Exited campaign Id: Campaign ID which we see in campaign url. -Member tags: Tags member is associated with. -Loyalty tier name: Loyalty tier name. -Loyalty tier Id: Loyalty tier ID. -Qualified points: Members qualified points. -Lifetime points earned: Lifetime point earned by the member. -Lifetime points redeemed: Lifetime point redeemed by the member. -Lifetime points deducted: Lifetime point deducted by the member. -Available points: Available points of the member. |
Testing
To test if Salesforce Sales Cloud is successfully installed, follow the given steps:
- Add a member in Zinrelo Admin console.
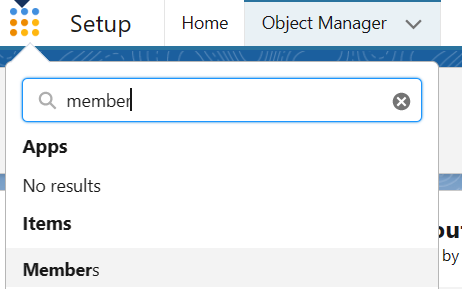
- Once member is created, go to Salesforce Sales Cloud and click on the nine dots.

- Search for "Members" and click.
- Click on the drop-down and click "All."
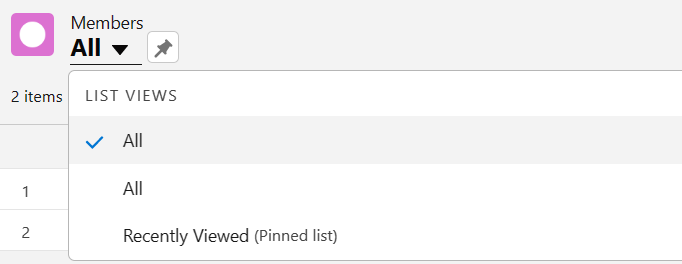
- The member you added in Zinrelo Admin console will be visible in this page.
Note: If you do not see Members in nine dots drop-down, you have to create the member object.
Step 1: In Quick Search, search "Tabs" and click on it.
Step 2: Click on the "New" button.
Step 3: Enter the details.
- Select "Members" from the object dropdown.
- Select the tab style.
- Click on the "Next" button.
Step 4: Click on the "Next" button.
Step 5: Then, click on the "Save" button.
Updated about 2 months ago